
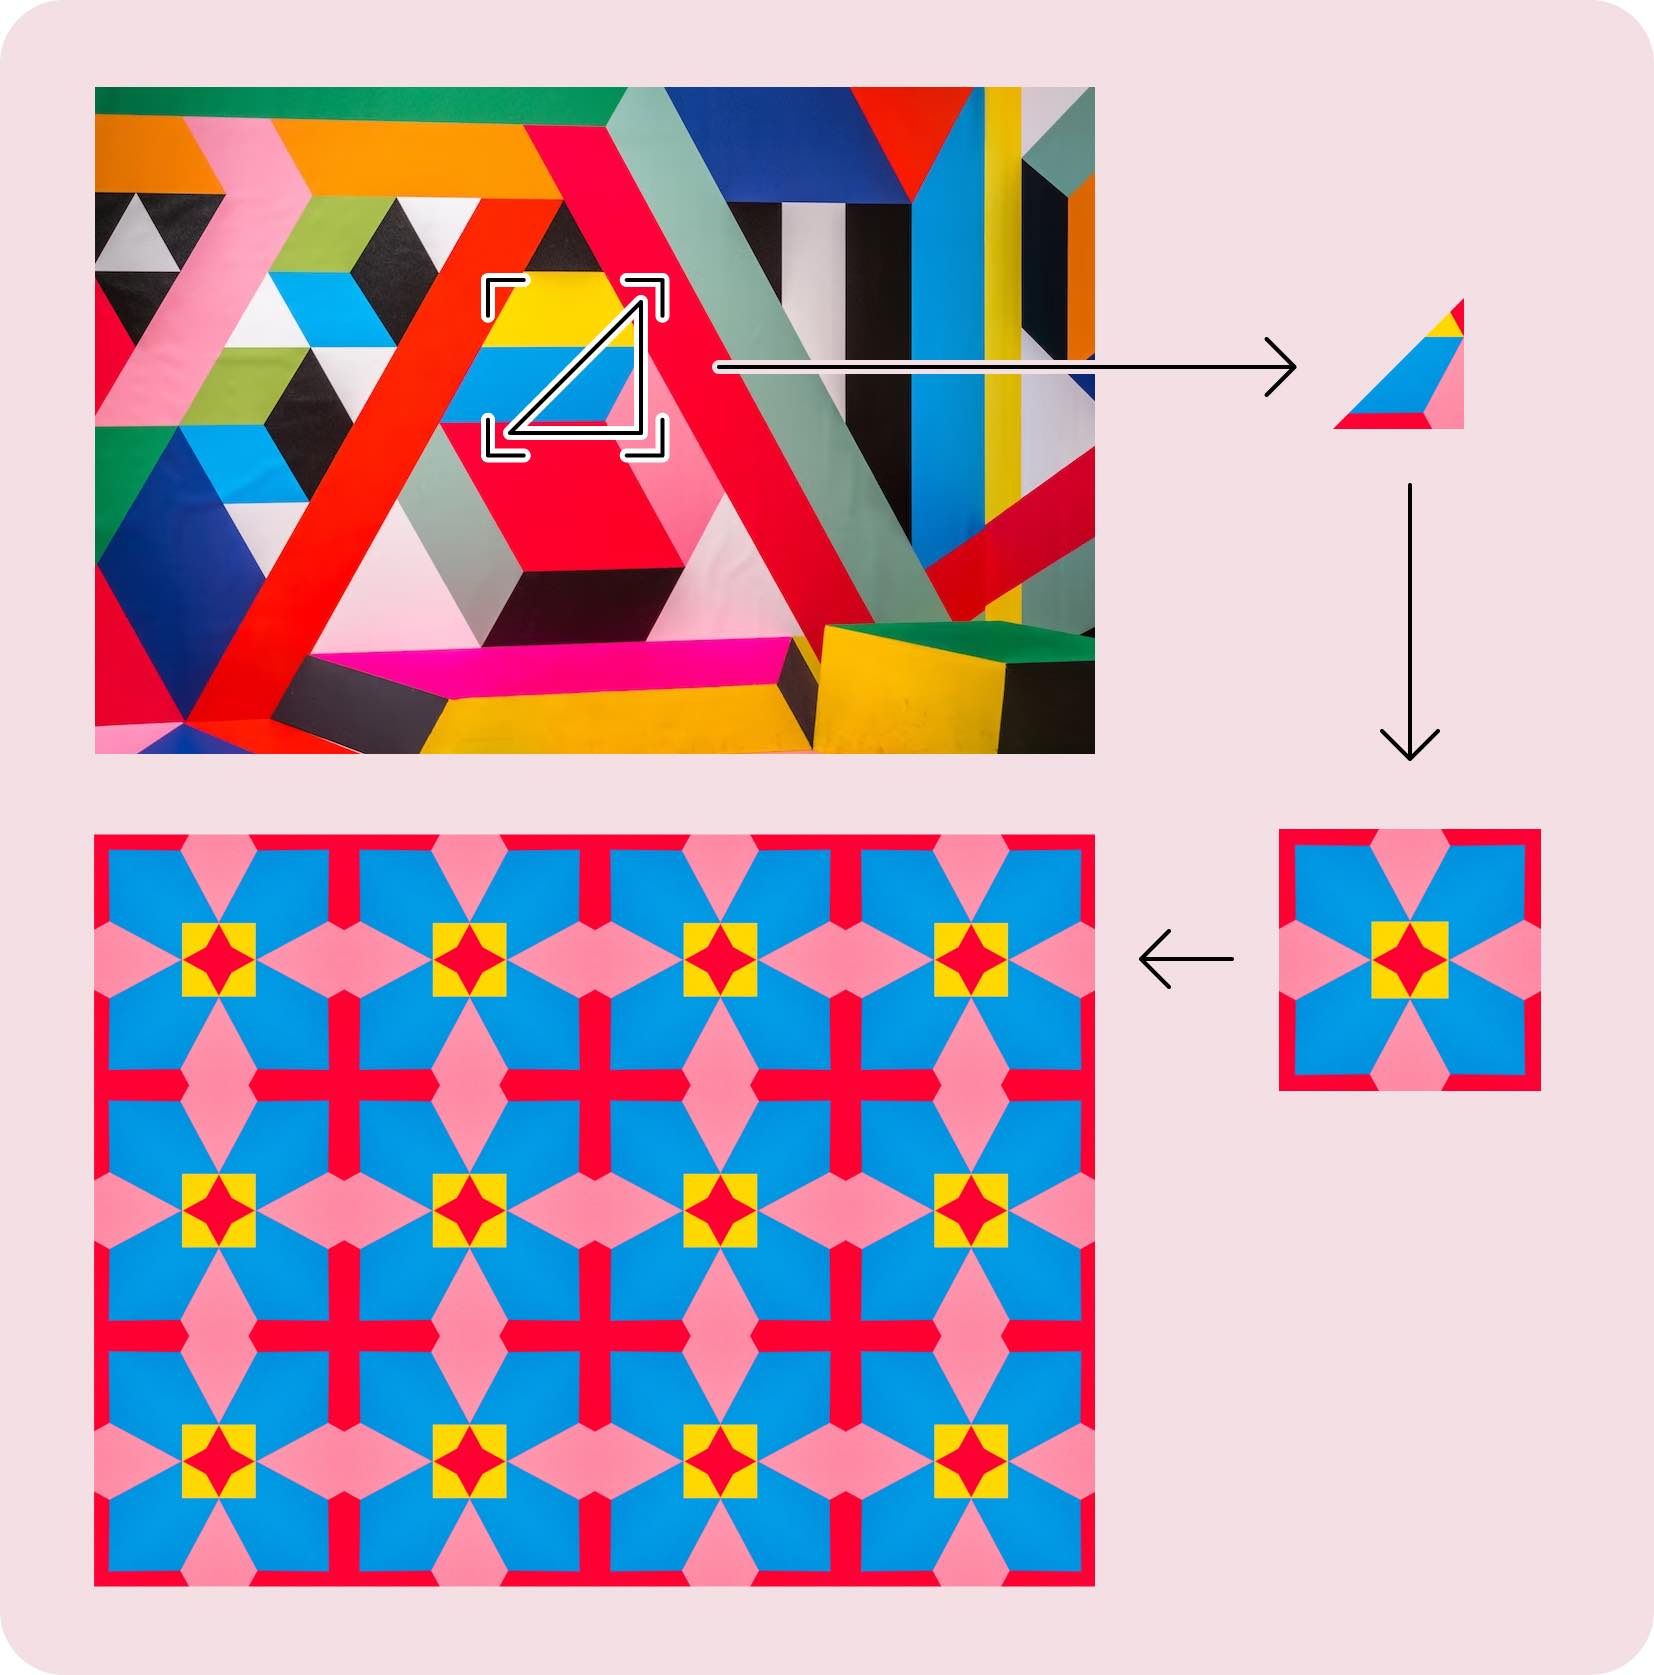
First things first... how is a Repper pattern made?
Here are the steps from source image to pattern:
- We take a sample of the source image
- Then use a tiling (think "pattern template") to turn that into a pattern tile
- Which you can then export as a single tile or large surface.
(Not exactly sure what a "tiling" is? You're in luck, check out our in-depth video!)
Let's dive into each of these steps to see what happens and what you can do to assure you are getting high quality and resolution patterns at the end.
Source image
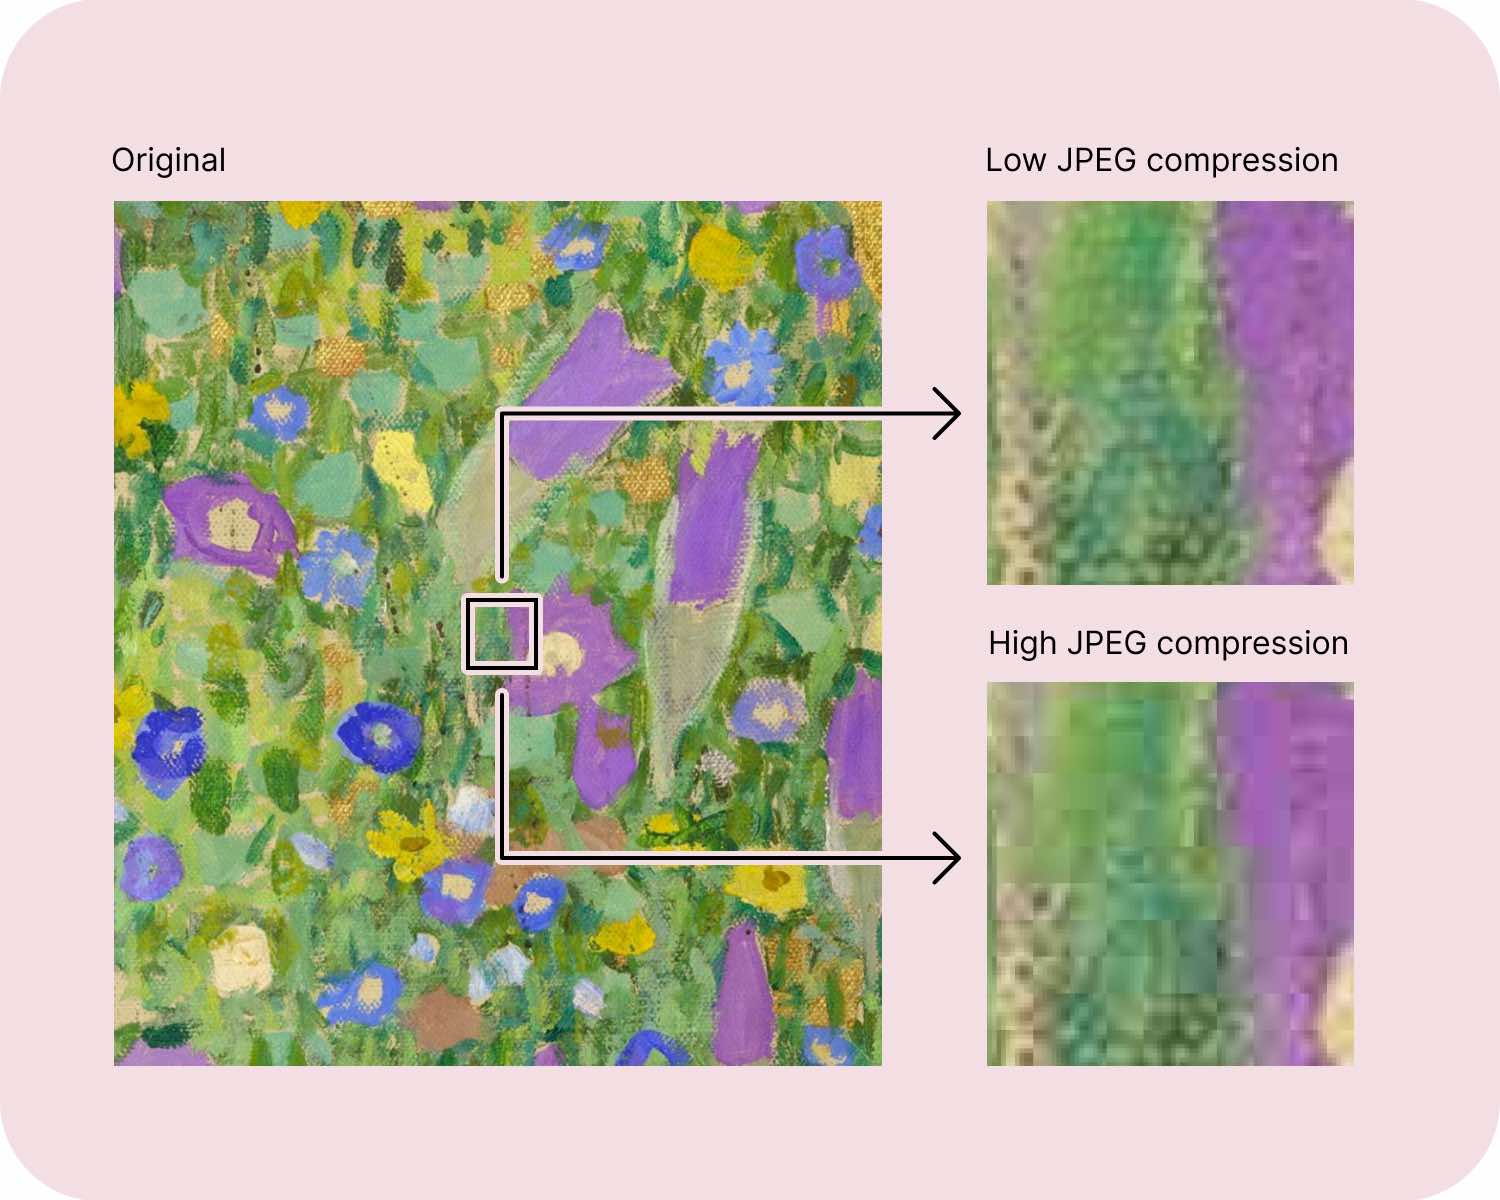
Everything begins with a high quality source image, and resolution is key here. In general: the higher the resolution, the better. Repper can handle images up to 12,000 × 12,000 pixels and 15 megabytes.
Got a very high resolution image with a ton of detail that is larger than 15MB? A little image file compression can reduce file size a lot without noticeable loss of image quality, which is preferable over reducing the resolution (meaning number of pixels).
Other things to look out:
- Avoid starting with heavily compressed images, like some you may find online. The best thing is to either create your own or get them from high quality asset libraries (make sure to check their terms of usage).
- When exporting your own file or getting them from elsewhere, don't pay attention to the DPI of the image. All that matters for Repper is the actual pixel resolution. Curious why? Look at our blog series on DPI, especially the article on Myths and Misunderstandings.
Read more about source image quality in our help centre article Source images: how to get off to a good start.
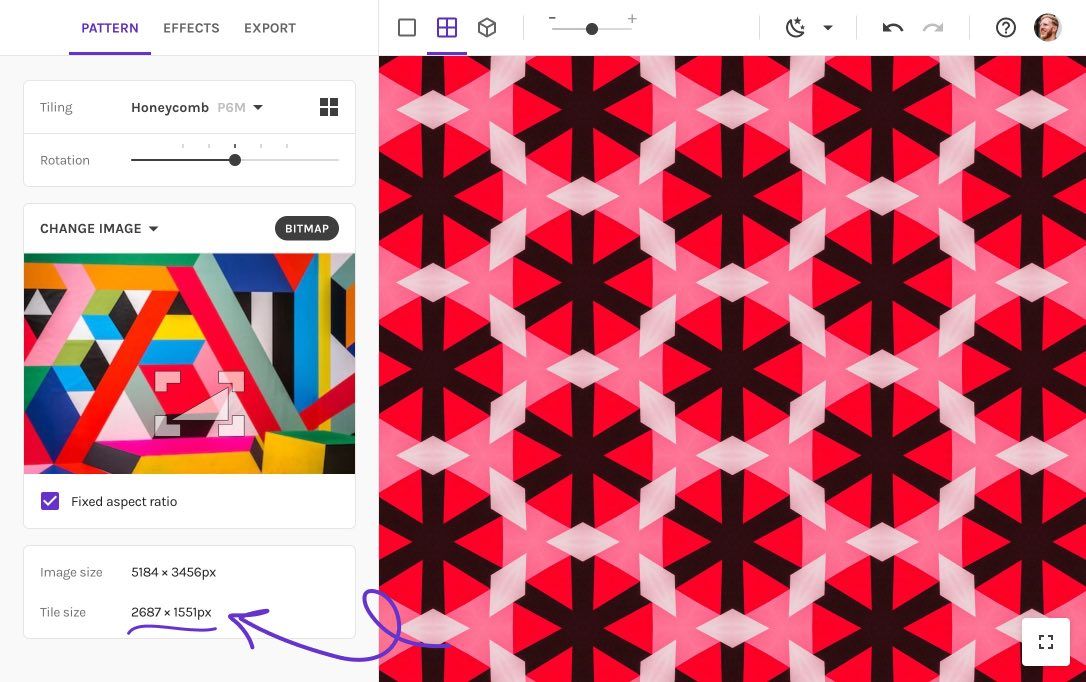
Sample area
The part of the image you select as the basis for your pattern is called the sample. As you probably guessed, a larger sample will give you a higher resolution pattern!
Below are two patterns based on the same source image and same tiling. As you can see, the larger sample gives you a higher resolution tile.
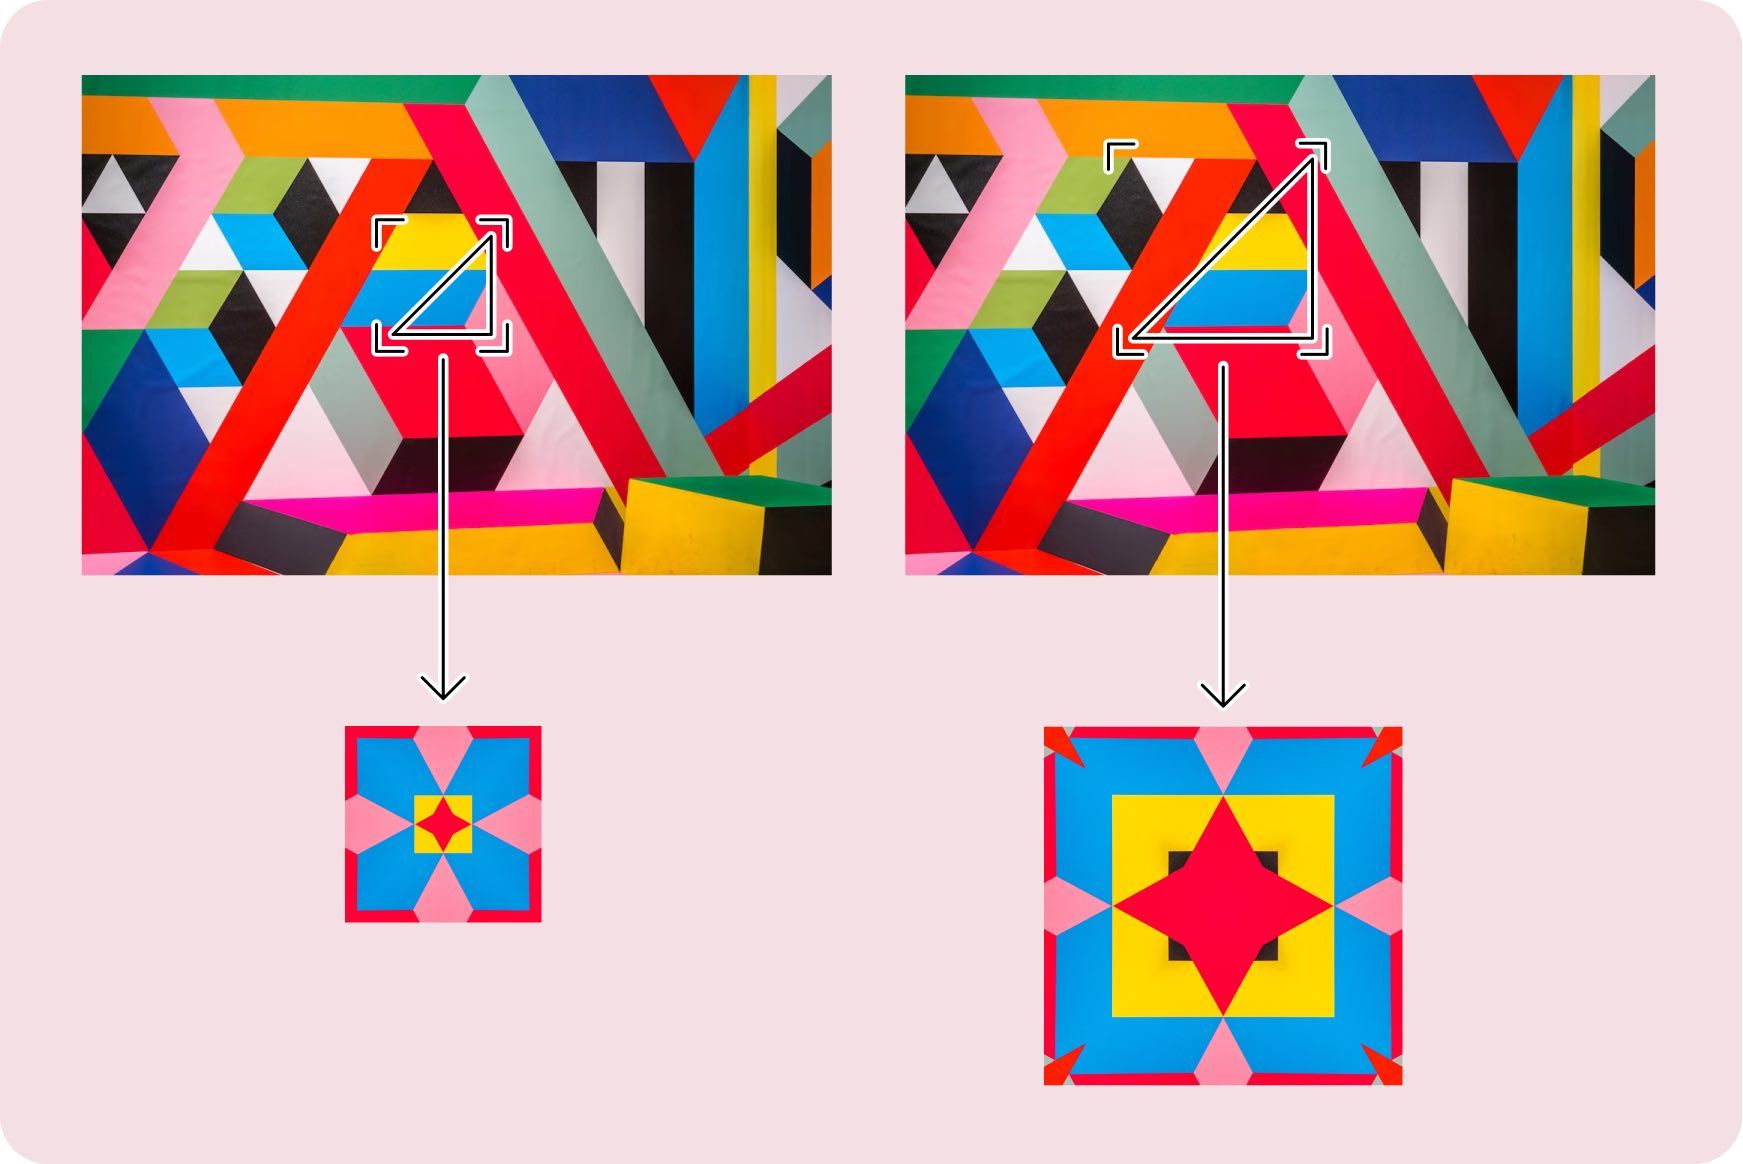
This is why it’s so important to start with a large source image: you want to have the creative freedom to experiment with both larger and smaller samples.
Are you noticing you are finding lots of good patterns in a small section of the image? See if you can export a larger resolution image of just that part. If the original image was vector and you have access to that file, this should be especially straightforward.
Tiling
Repper comes with dozens of tilings. The more complex the tiling, the larger the resulting pattern will be.
Let’s use the same sample for a Cross and an Echo Tile pattern. Because the Echo Tile pattern has many more reflections, its pattern tile has a high resolution. Below you see the relative scale of the two tilings:
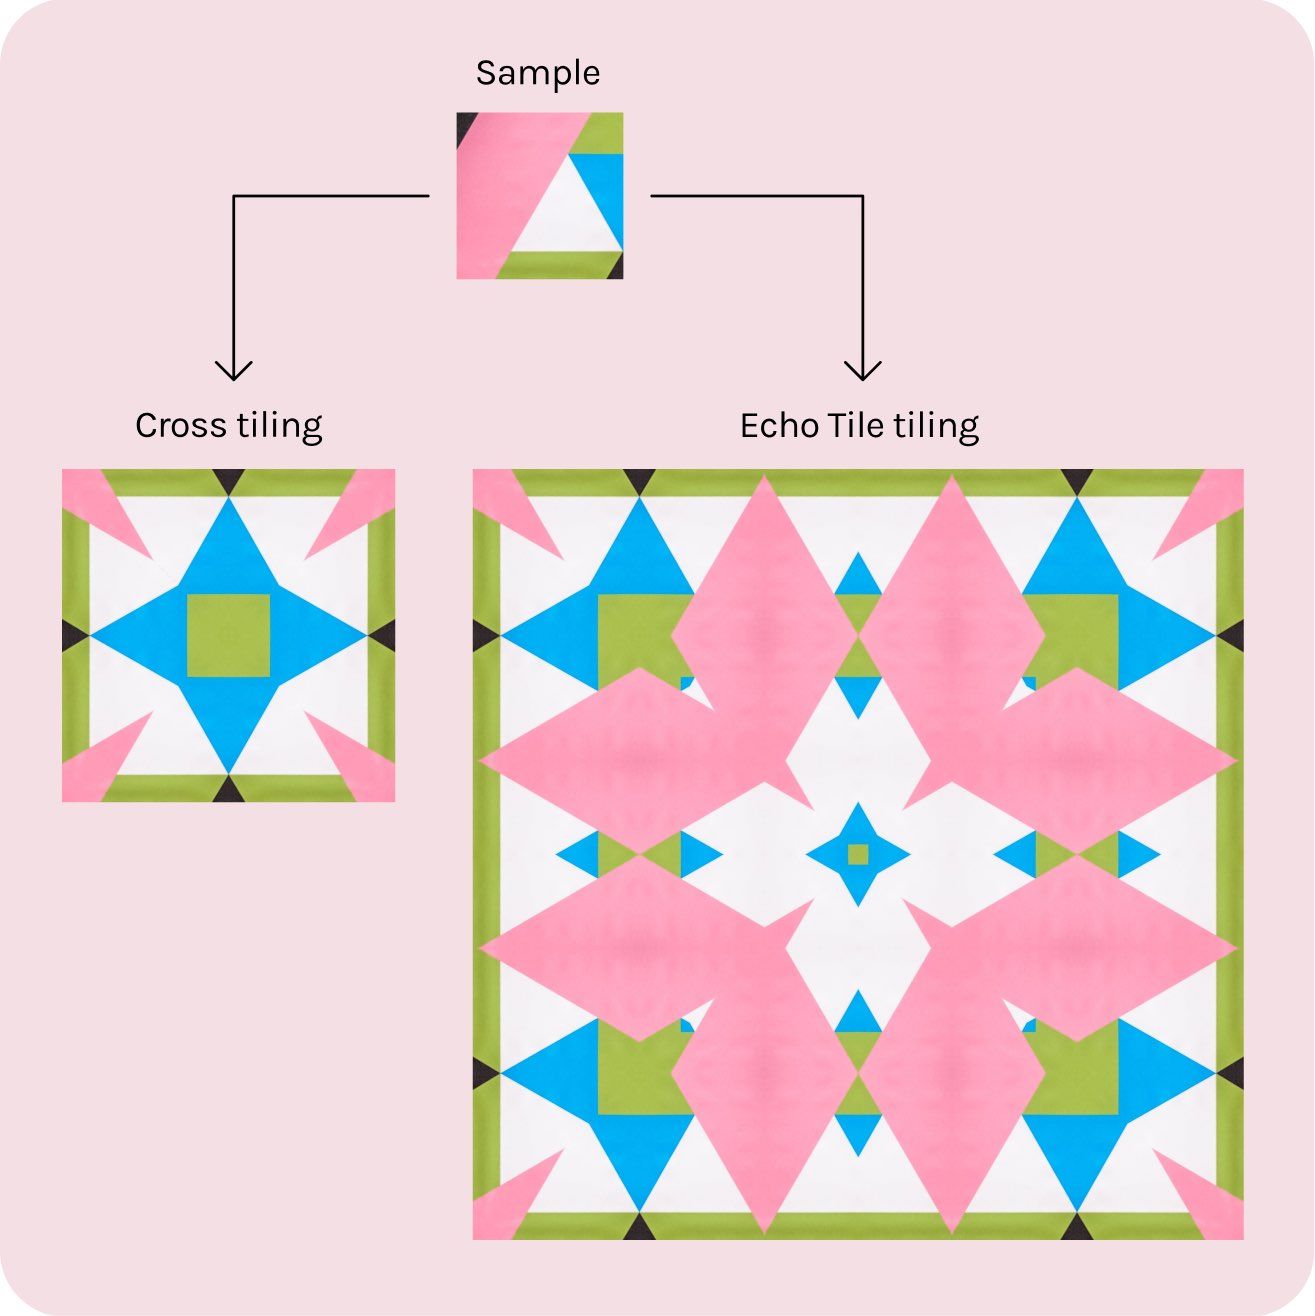
Let’s be clear: this is not to say that the Echo Tile tiling is any better than the Cross tiling! They both have their own aesthetic and uses. But it’s good to remember that given the same sample, different tilings will give you different tile resolutions.
Tip: See your tile resolution on-the-fly
While designing, keep an eye on the tile size at the bottom of the Pattern tab. This will show you the maximum resolution of a single tile of the current pattern (without upscaling the source image).
Exporting your pattern
There are three ways to export your pattern: as a tile, a surface and as a 3D preview. 3D exports are mostly for promotional material, so we’ll focus on the other two which are used for print and production.
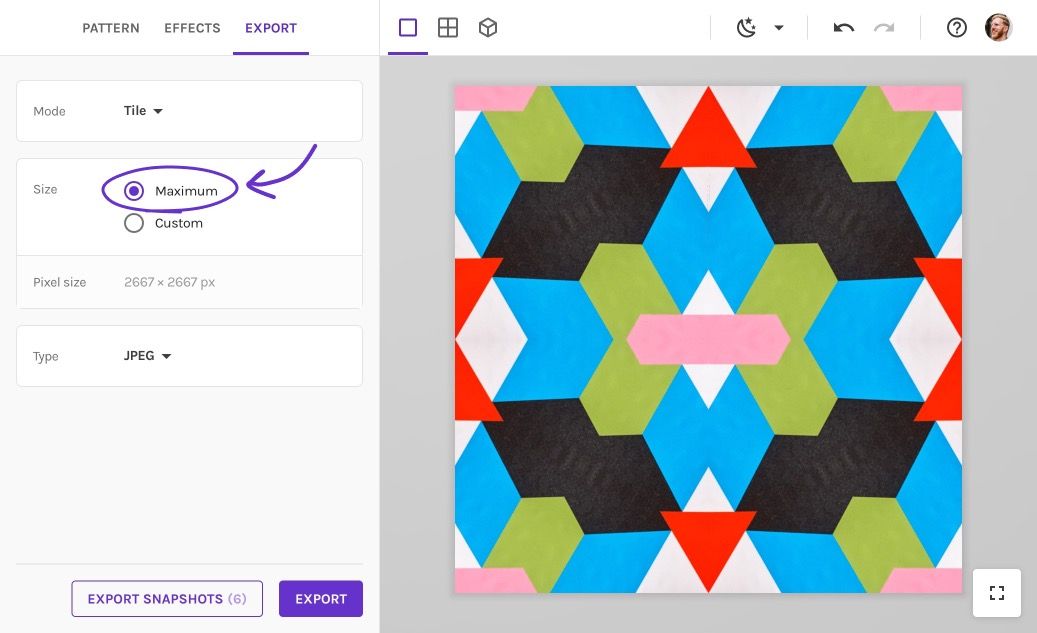
Export as single tile
For the single tile export, it’s pretty straightforward: unless you have a good reason to export at a smaller size, simply use the “Maximum” option. This will give you the largest possible tile and thus the most flexibility when using your tile later on in other graphic software or production services that can repeat it for you as need be.
For the nitty-gritty details and tips, read our help centre article Export as Tile.
Export as a surface
For surface export, this approach works well for most cases:
- First, set the resolution you require for the digital asset or physical print. If you have a specific physical size on mind, simply set "Unit" to inches or centimetres and set the desired DPI. Repper will automatically calculate the required pixel resolution!
- Next, play around with the repeats to see how small or large you want your pattern to appear. Try to visualise how large the surface will be shown on screen or on the printed surface, so the pattern has the right proportion.
While playing with the export values, you may occasionally see a warning that the source image will require upscaling at these settings (see image below).
In that case you can either:
- Increase the repeat count (and keep your resolution)
- Reduce your resolution (and keep the current repeat count)
- Or, leave it as is (and accept that the source image will be scaled)
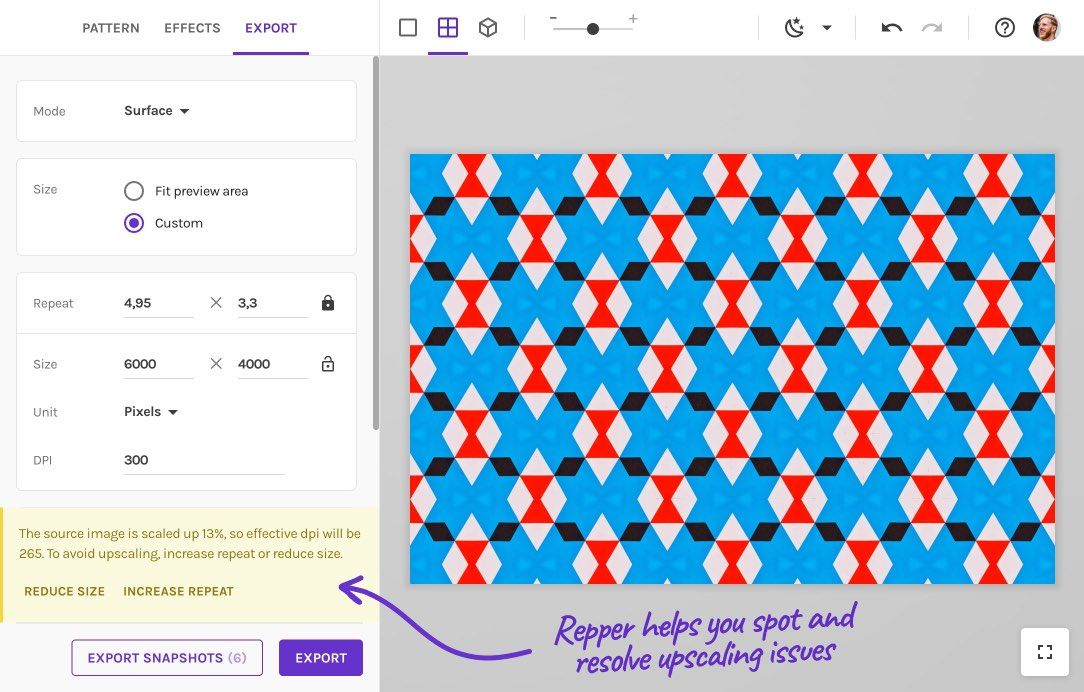
Note that a little upscaling is not necessarily a problem, though I'd recommend to keep the upscale percentage in the low double digits.
Think of it this way: a 200×200 pixel pattern scaled up to 2,000×2,000 pixels will still look like a low resolution pattern, just in a lot larger image file. However, if you need a 2,000×2,000 pixel surface for a specific print and the perfect repeat count requires 10-20% upscaling, just do an export and have a look at the exported image. If it looks fine, you're probably good to go.
Learn more about exporting surfaces in our help article Export as Surface.
In summary
The final resolution of your pattern is affected by each step in the process from source image to pattern. In this article we went through those steps and saw what you can do to get to your desired high-quality patterns.
The main takeaways:
- Starting with a high-resolution source image gives you the most flexibility.
- Taking a larger sample from the source image gives you a larger pattern.
- Different tilings give you different resolution patterns (more reflections in pattern = higher resolution)
- When exporting, let Repper help you: For tile export, make use of the Maximum size option; for surface export, keep an eye on any warnings and suggested solutions.
I hope this was helpful to you in your quest to making evermore gorgeous patterns! If you have any questions, just contact us at support@repper.app.
Make beautiful geometric patterns with Repper
Instant results · 14 days free access · No strings attached
Create your own pattern